Creating a Kubernetes cluster with Rancher is easy – it is just a few clicks and a little copy-paste magic. However, you need the machines or nodes to exist before you begin.
There are two parts to a Kubernetes Cluster – the control plane and the worker. The control plane must be installed on Linux nodes; the workers can be either Linux or Windows.
Rancher’s documentation can be found here: – https://ranchermanager.docs.rancher.com/
There should be at least 3 control plane nodes and 3 worker nodes for high availability.
To conserve electricity, I don’t want to run too many servers. Instead, I only want to run 2 servers, and those servers have to run everything I need. This includes all of the Kubernetes nodes and my other VMs. So, I haven’t bothered to set up 3 control plane nodes – I only have one.
Creating a Node
As most of the services I run on Kubernetes have modest resource requirements, each node is set up as a Linux Ubuntu VM with 8GB of RAM and 4 CPU cores. Except for the nodes I use for Longhorn storage, each node has 32GB of disk – this is enough for most use cases and gives each node plenty of space for logs, etc. The Longhorn nodes have 128GB of disk.
I follow the instructions in Creating a new Ubuntu Server VM in Proxmox to set my nodes and then issue the following commands to enable them to access NFS shares: –
sudo apt install nfs-commonEach node is given a unique name, part of which includes the name of the cluster. So my node names look like this: –
k8stest01, k8stest02 – with k8stest being the name of the cluster.
The nodes used for Longhorn are set up as k8stest03storage1, k8stest03storage2, etc. These nodes have larger disk sizes to hold the pods’ distributed, cloned storage.
Creating the Cluster in Rancher
When you select the Create Cluster button on the screen below, you are given the option of creating it on one of the cloud providers, on Harvester machines, or existing Linux nodes: –

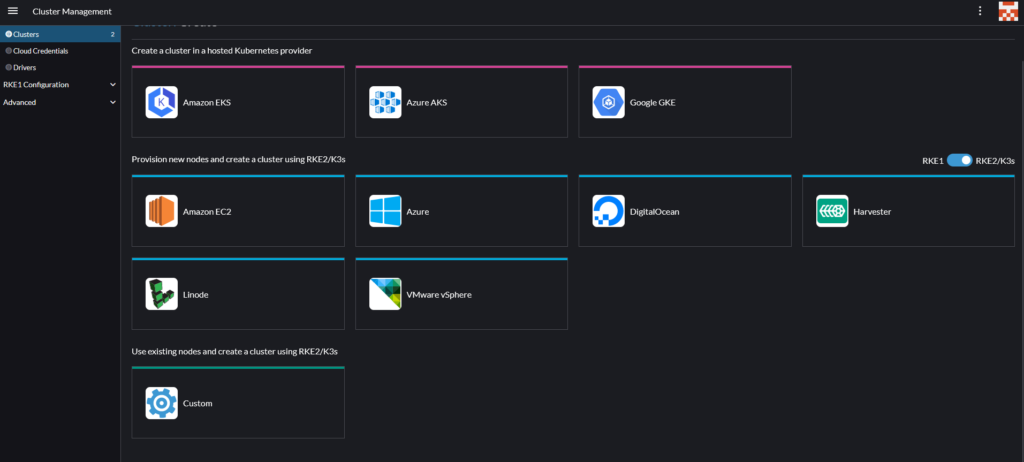
Selecting Custom shows this screen where you define the cluster: –
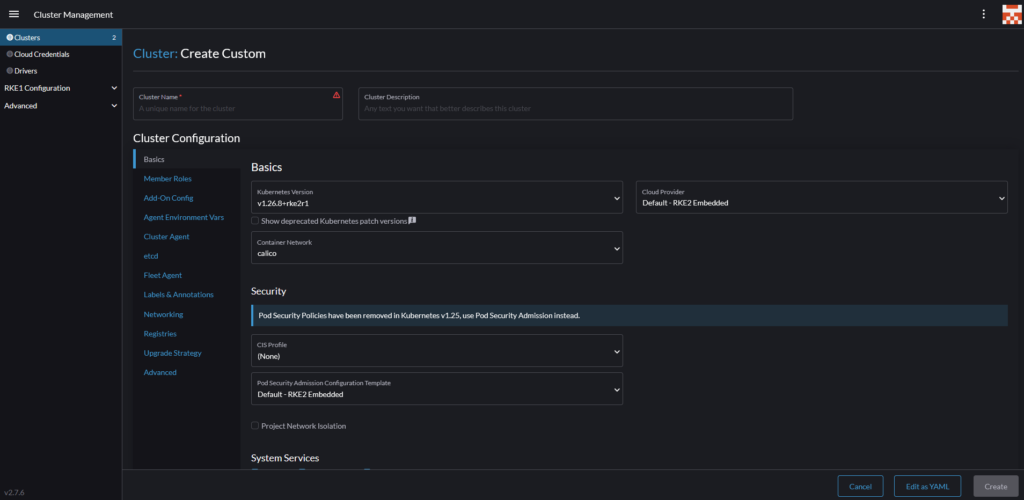
You give the cluster a unique name and select the type of K8s you want to use. So many settings are available across the sections displayed above that it is difficult to know where to start. Fortunately, unless you have very specific requirements, you don’t need to touch any of them, and your cluster will be created without any fuss.
When you click Create, Rancher starts to provision the cluster and it displays this screen: –
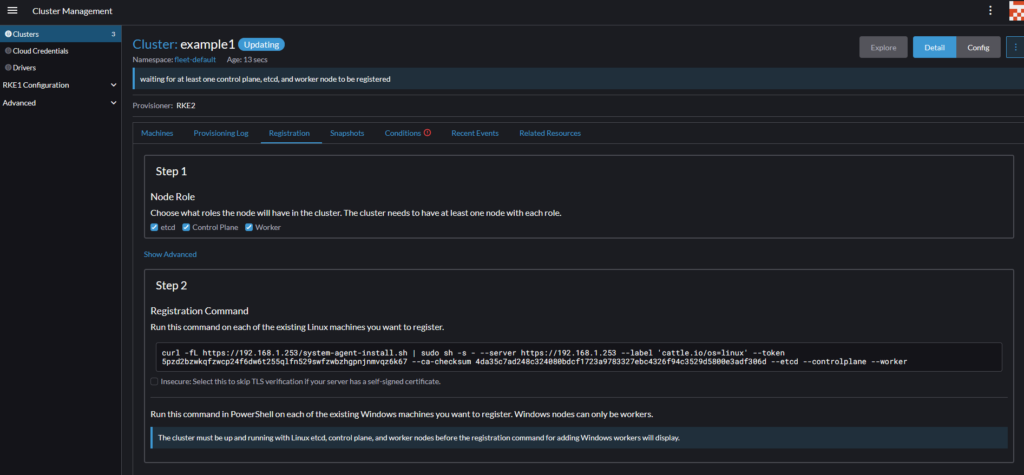
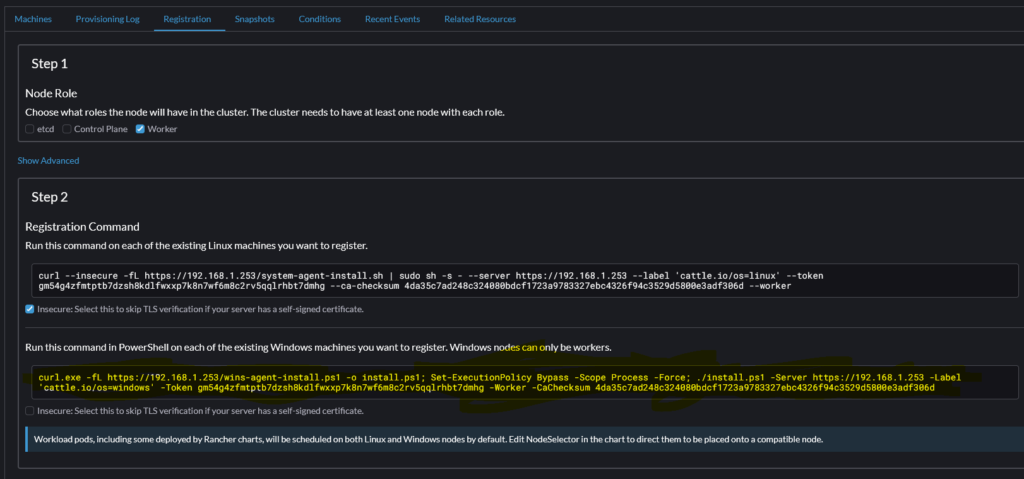
This page is important because it gives you the code you need to run on your nodes to have them join the cluster.
I like to set up the control plane node without the ability to run worker pods. So, I unchecked the Worker checkbox for that node. Unless you want to get into handling certificates on the nodes that join the cluster, I also check the ‘Insecure’ checkbox. This changes the bash script that it produces and allows the scripts to be run on each node without throwing a load of security error messages.
curl --insecure -fL https://192.168.1.253/system-agent-install.sh | sudo sh -s - --server https://192.168.1.253 --label 'cattle.io/os=linux' --token 5pzd2bzwkqfzwcp24f6dw6t255qlfn529swfzwbzhxxxxxxxxxx --ca-checksum 4da35c7ad248c324080bdcf1723a9783327ebc4326f94c3529dxxxxxxxxxxx --etcd --controlplaneThis is the command that Rancher outputs to add a control plane node. The one below is for a worker node: –
curl --insecure -fL https://192.168.1.253/system-agent-install.sh | sudo sh -s - --server https://192.168.1.253 --label 'cattle.io/os=linux' --token 5pzd2bzwkqfzwcp24f6dw6t255qlfn529swfzwbzhxxxxxxxxxx --ca-checksum 4da35c7ad248c324080bdcf1723a9783327ebc4326f94c3529dxxxxxxxxxxx --workerThe great thing is that you can access this section to add more nodes to your cluster as you need them. This isn’t a one-time deal. You can add more nodes as your needs grow.
When you run these commands on your nodes, that triggers each node to download, configure and then join itself to the cluster. This can take a while, depending on your network speed, the speed of your internet connection, and the resources you defined for each node. Eventually, you see the nodes appear in the Rancher screen below: –
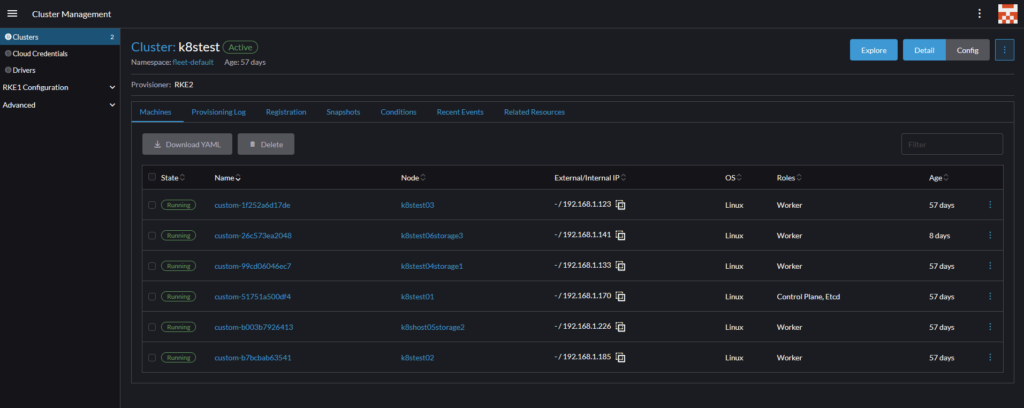
Each node is up and running in this example, but before they change to that state, they are in a provisioning state. Each node can take quite a few minutes to be in the ‘ready’ state, so you need to be patient and wait/keep refreshing this page.
To add more nodes to the cluster, follow this process: –
Click the hamburger icon in the top left and select cluster management to get to this screen: –
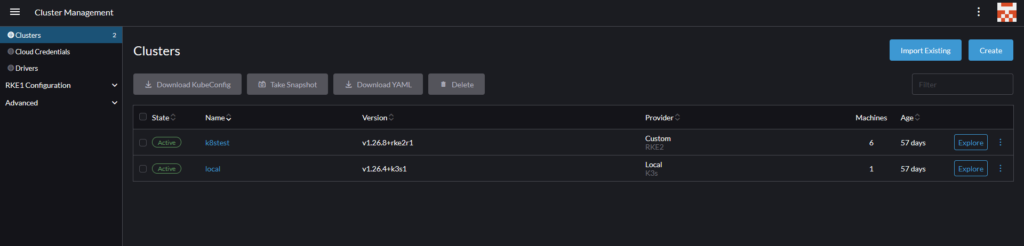
Then, select the cluster by clicking on its name in the Clusters pane. This displays the following screen: –
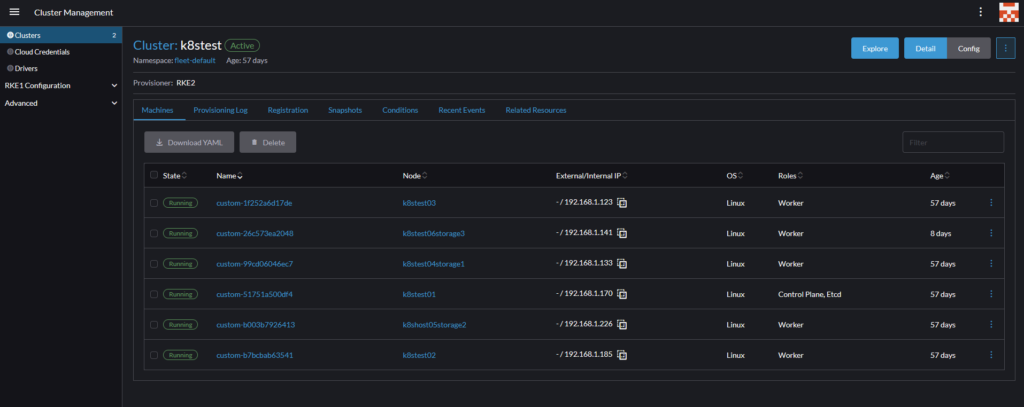
The ‘Registration’ link in the centre section of this page takes you to the same page we used when creating the cluster: –
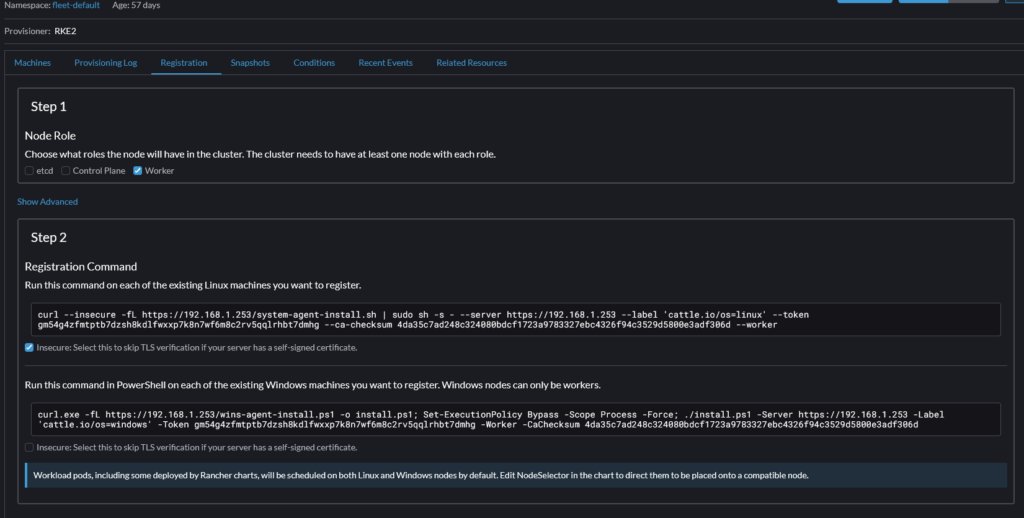
Here you can add a control plane, etcd controller or a worker node.
Add a Windows Node
If you want to add a Windows Node to your cluster rather than another Linux Node, you can follow the Powershell instructions that appear on the ‘Registration’ screen: –