There are several tools for managing Kubernetes or K8s, from ‘kubectl’ to one of my favourite tools – ‘Lens’. These two tools are at opposite ends of the spectrum, with ‘kubectl’ being CLI-based and Lens being the much more friendly Windows-style application.
However, other tools lie somewhere between the two, and one such tool is ‘K9s’.
You can download K9s here: – https://k9scli.io
At the time of writing, it has all of these features: –
- Information At Your Finger Tips!
- Tracks in real-time activities of resources running in your Kubernetes cluster.
- Standard or CRD?
- Handles both Kubernetes standard resources as well as custom resource definitions.
- Cluster Metrics
- Tracks real-time metrics associated with resources such as pods, containers, and nodes.
- Power Users Welcome!
- Provides standard cluster management commands such as logs, scaling, port-forwards, restarts…
- Define your own command shortcuts for quick navigation via command aliases and hotkeys.
- Plugin support to extend K9s to create your very own cluster commands.
- Powerful filtering mode to allow users to drill down and view workload-related resources.
- Error Zoom
- Drill down directly to what’s wrong with your cluster’s resources.
- Skinnable and Customizable
- Define your very own look and feel via K9s skins.
- Customize/Arrange which columns to display on a per-resource basis.
- Narrow or Wide?
- Provides toggles to view minimal or full resource definitions
- MultiResources Views
- Provides an overview of your cluster resources via Pulses and XRay views.
- We’ve got your RBAC!
- Supports for viewing RBAC rules such as cluster/roles and their associated bindings.
- Reverse lookup to assert what a user/group or ServiceAccount can do on your clusters.
- Built-in Benchmarking
- You can benchmark your HTTP services/pods directly from K9s to see how your application fares and adjust your resource request/limit accordingly.
- Resource Graph Traversals
- K9s provides for easy traversal of Kubernetes resources and their associated resources.
My desktop of choice (at the moment) is Windows 11, and I use Terminal for most things.
Installing K9s on Windows is as simple as: –
choco install k9sHowever, you can install versions of K9s on Linux, Mac, etc. It is important to install K9s as an administrator or ‘choco’ will report installation errors. I didn’t do this the first time, but it ran through fine once I re-ran it as an administrator, and I didn’t have to undo anything before attempting the re-install, which was a nice surprise.
It then gives you extra ways to manage K8s. My favourite way is simply to issue the following command: –
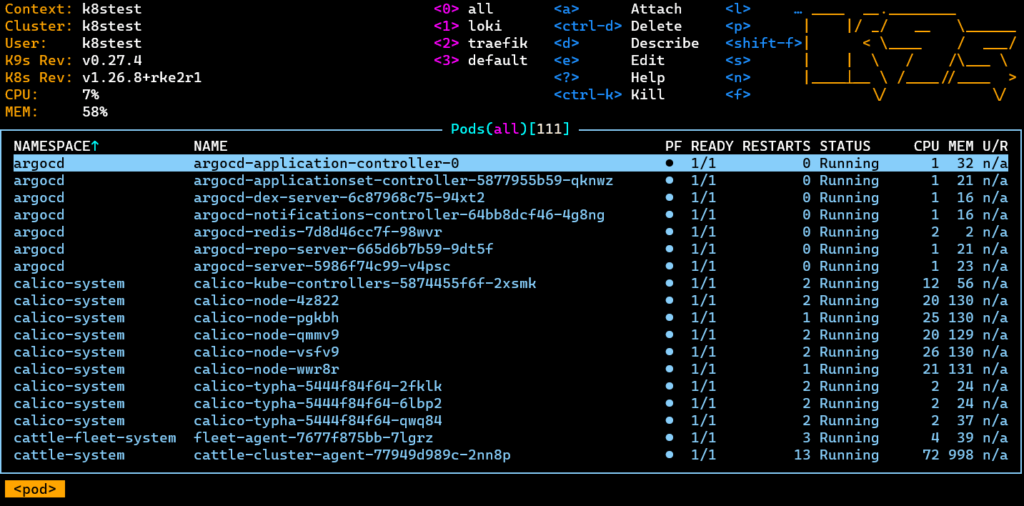
k9sAfter a couple of seconds, you get a screen that looks like this: –

There are many options for controlling the colours, but I like this standard one. The best part about it is you can ‘drill into’ namespaces, deployments and pods using the arrow keys and pressing enter; you can describe by hitting ‘d’ and attaching to a pod with ‘l’. Again, there are lots of command shortcuts you can use.
Pressing Escape moves you back up the tree, and ctrl-C quits out of K9s.


