What is ArgoCD?
Argo CD follows the GitOps pattern of using Git repositories as the source of truth for defining the desired application state. Kubernetes manifests can be specified in several ways:
- kustomize applications
- helm charts
- jsonnet files
- Plain directory of YAML/json manifests
- Any custom config management tool configured as a config management plugin
Argo CD automates the deployment of the desired application states in the specified target environments. Application deployments can track updates to branches, tags, or pinned to a specific version of manifests at a Git commit.
Argo CD is implemented as a Kubernetes controller which continuously monitors running applications and compares the current live state against the desired target state (as specified in the Git repo). A deployed application whose live state deviates from the target state is considered OutOfSync. Argo CD reports & visualizes the differences while providing facilities to automatically or manually sync the live state back to the desired target state. Any modifications made to the desired target state in the Git repo can be automatically applied and reflected in the specified target environments.
Installation
Having used various CI/CD pipelines throughout my career, I could not believe how easy it was to install and configure ArgoCD.
ArgoCD is provided using Helm charts and can be installed in seconds. You create a namespace and install the chart with the following kubectl commands: –
kubectl create namespace argocd
kubectl apply -n argocd -f https://raw.githubusercontent.com/argoproj/argo-cd/stable/manifests/install.yaml
This creates everything needed to run ArgoCD, but it doesn’t provide a route into the system. So, as I use Traefik, I created an additional manifest for the IngressRoute like this: –
apiVersion: traefik.containo.us/v1alpha1
kind: IngressRoute
metadata:
  name: argocd-server
  namespace: argocd
spec:
  entryPoints:
    - websecure
  routes:
    - kind: Rule
      match: Host(`argocd.intrasoftware.uk`)
      priority: 10
      services:
        - name: argocd-server
          port: 80
    - kind: Rule
      match: Host(`argocd.intrasoftware.uk`) && Headers(`Content-Type`, `application/grpc`)
      priority: 11
      services:
        - name: argocd-server
          port: 80
          scheme: h2c
  tls: {}
I then created the route in Kubernetes with this command: –
kubectl create -f ingressroute.yamlThe Dashboard
This then allowed me to access the ArgoCD dashboard by visiting https://argocd.intrasoftware.uk. Note the HTTPS. As Traefik is setup with cert-manager, Kubernetes associates ArgoCD with a globally valid SSL certificate.

When the system is first installed, the manifests create a default user called ‘admin’, but there is no default password as such. Instead, the password is the name of the pod.
Using Rancher or kubectl, you get the pod’s name and use that for the password. Once in, you can change the password to something you can remember. Note that previous versions of ArgoCD appear to have lacked the ability to change the password, and you needed to use the ArgoCD command line tool to do that – now it is included in the UI – result!
The screenshot below shows where this is done: –

Setting up an application
We all know that Kubernetes uses Helm charts and manifest files to define the services, pods, secrets, deployments, etc., and I firmly believe in Infrastructure-as-code, so I set up all of my manifest files and documentation in a set of folders which is stored in GIT in Azure DevOps. It is this GIT repository that I have connected to ArgoCD – or I connected ArgoCD to.
This is done in the section below: –
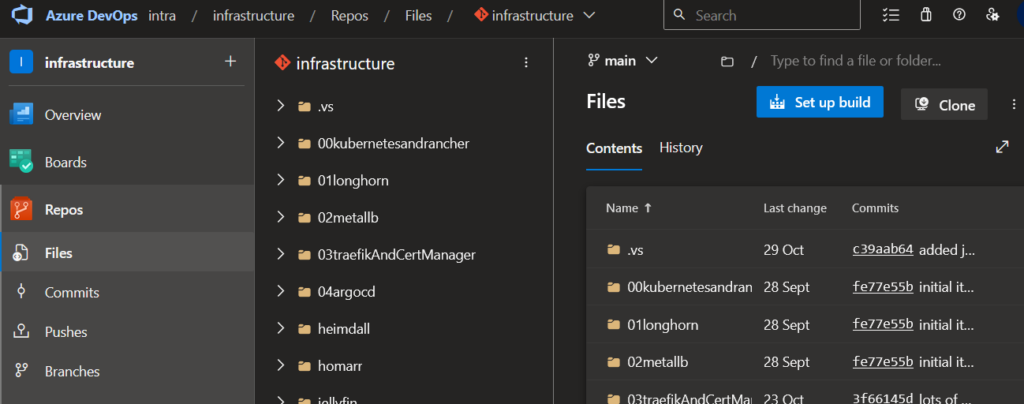
Before connecting ArgoCD to the GIT repository, you must set up Azure DevOps to allow it to connect. You do this by setting up HTTPS access to your repository. This is done by selecting the project and navigating to the Repos/Files section as shown below and then clicking on the ‘Clone’ button.
Then you click the Generate Git Credentials button: –
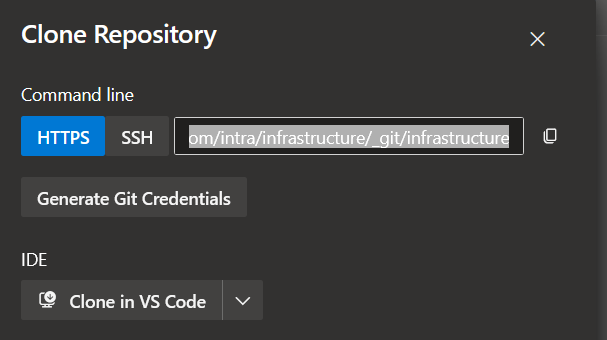
This shows the following screen and allows you to create an account and password: –
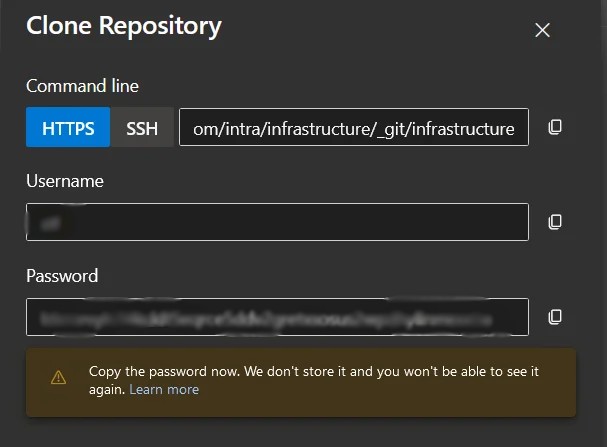
It is these credentials that are needed within ArgoCD to enable it to connect to the Git repository.
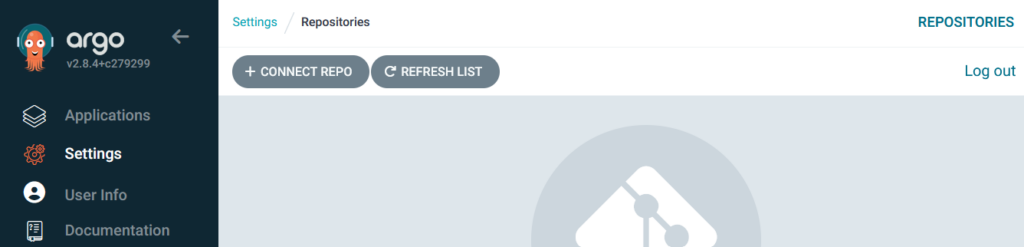
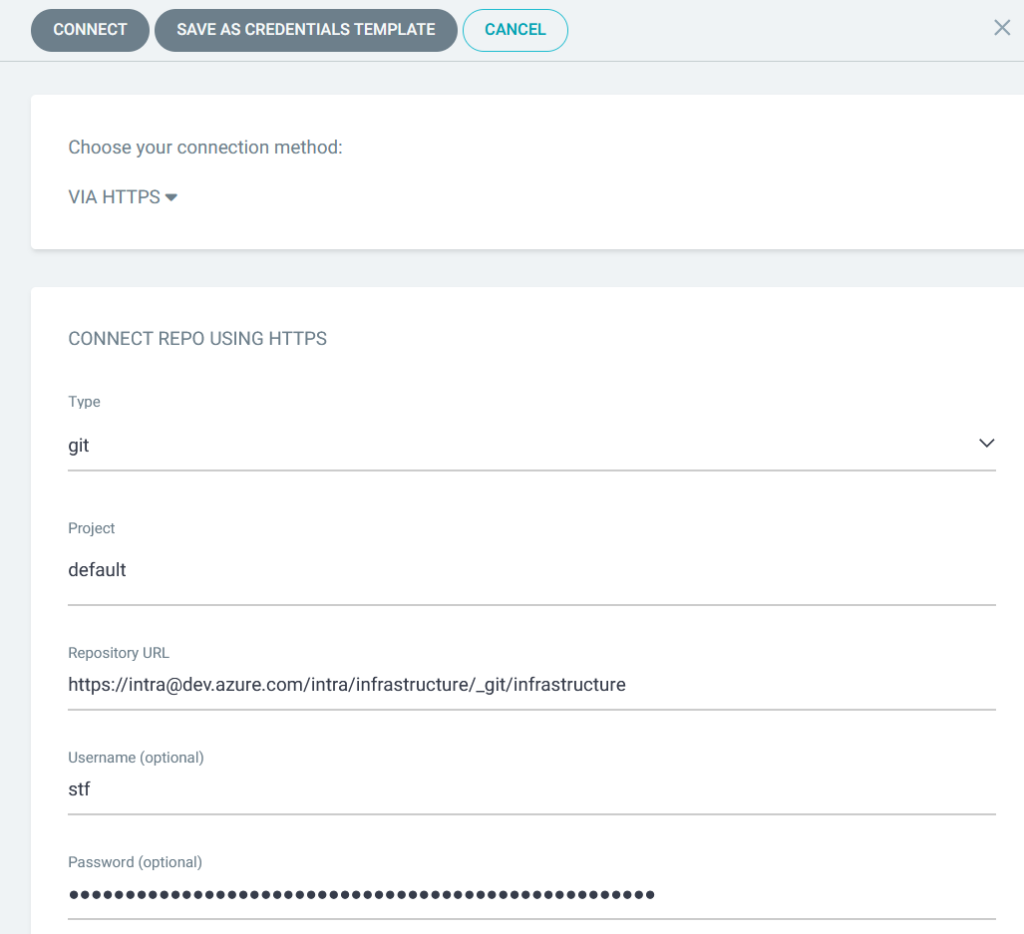
In ArgoCD, you click on the Connect Repo button and fill in the details as shown below: –
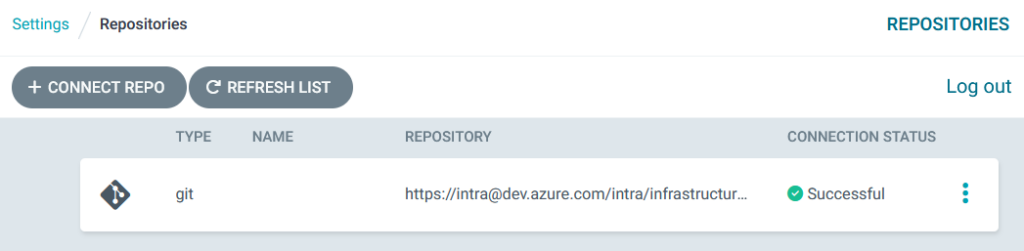
Assuming you copied everything correctly, ArgoCD returns you to this screen: –
Now, we can start to add an Application to deploy our resources.
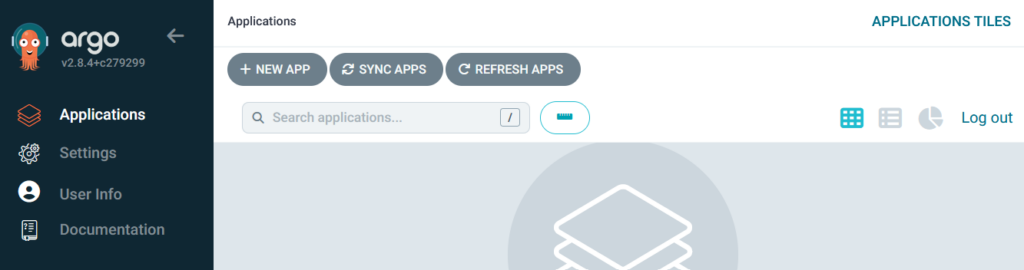
Clicking New App brings up the following screen where you define what is to be deployed: –
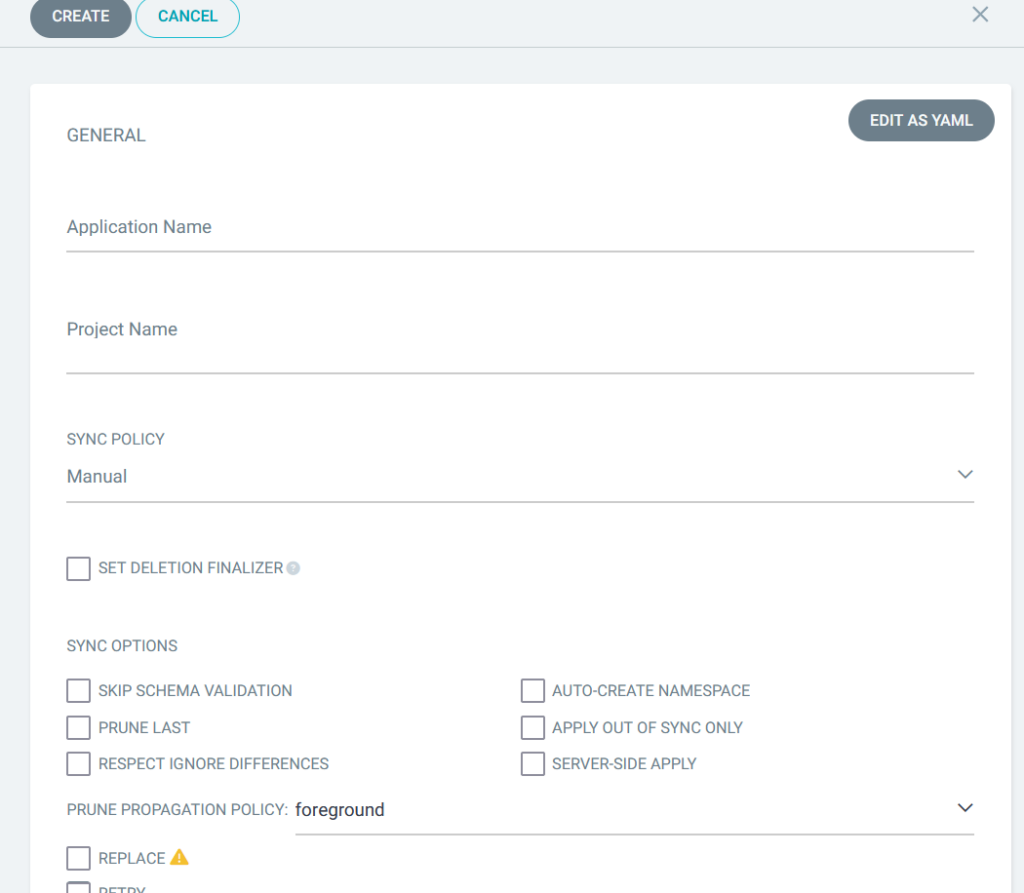
There are quite a few options on this screen, but I usually leave most of them unset and concentrate on the following fields (here I am setting up a deployment for Heimdall): –
| Application Name | heimdall | This has to be a lowercase name |
| Project | default | You can define as many projects as you want but I stick with default for all of my infrastructure deployments |
| Repo | My Git Repo | |
| Target Revision | HEAD | |
| Path | heimdall | This is the folder name in the repo that contains the manifests |
| Namespace | default | This will differ depending on what I am installing and where I want it |
| Branches | main | main is my production branch |
| Sync Policy | Manual | It is important to set this to manual when you start setting up a new application. We will change it to automatic later. |
| Cluster | Your cluster |
When you click the Create button, ArgoCD springs into action. It downloads the manifests from the Git repository and compares them with what is deployed in the cluster. Depending on what it finds, it shows that the resources are in sync or that differences need to be synced.
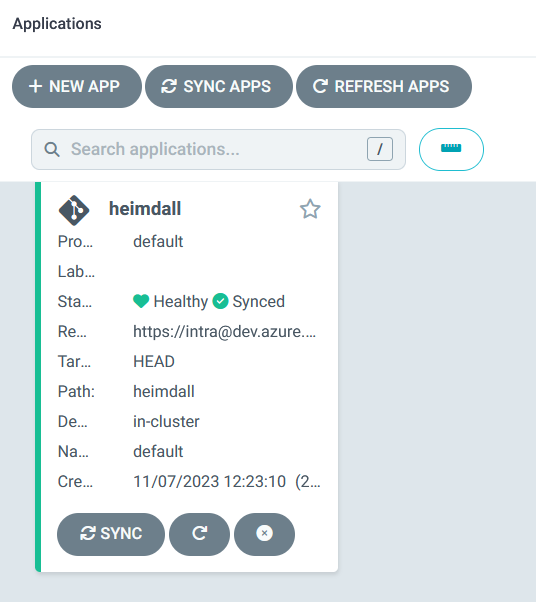
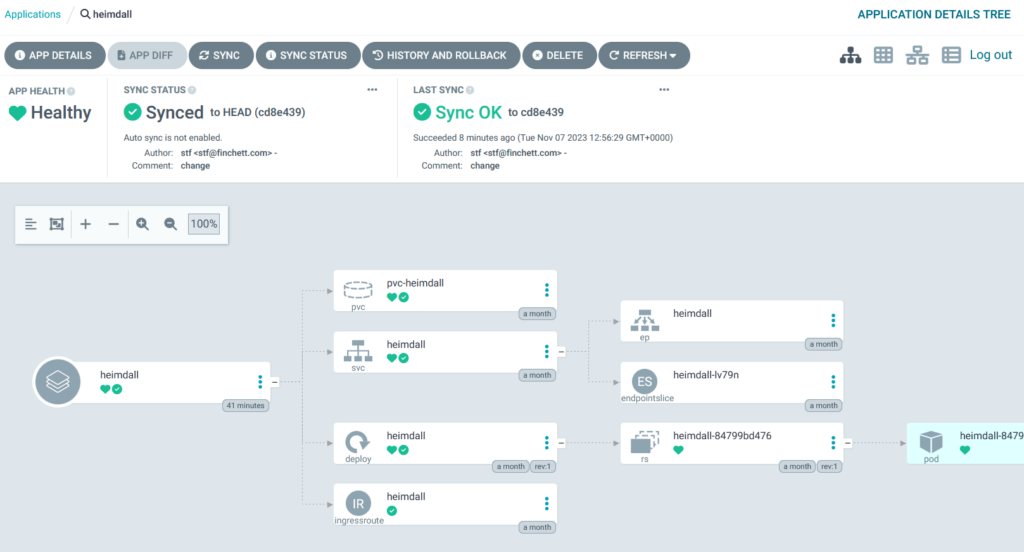
The screenshot below shows the Heimdall application on my cluster. In this instance, the manifests and the deployed resources are in sync, and everything is green: –
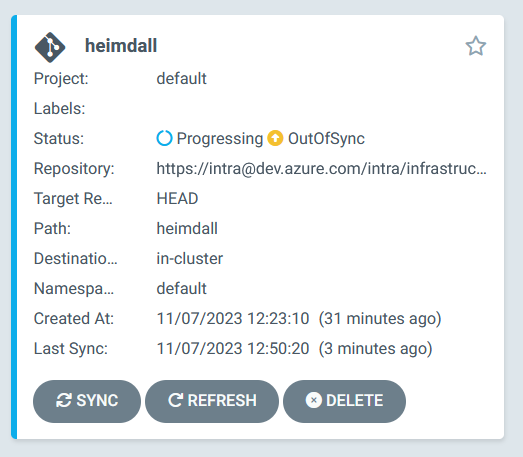
The example below shows when there are differences (for this, I changed the manifest file and pushed a change up to Git).
Pressing the Sync button synchronizes the cluster with the manifests and displays a screen that looks like this: –
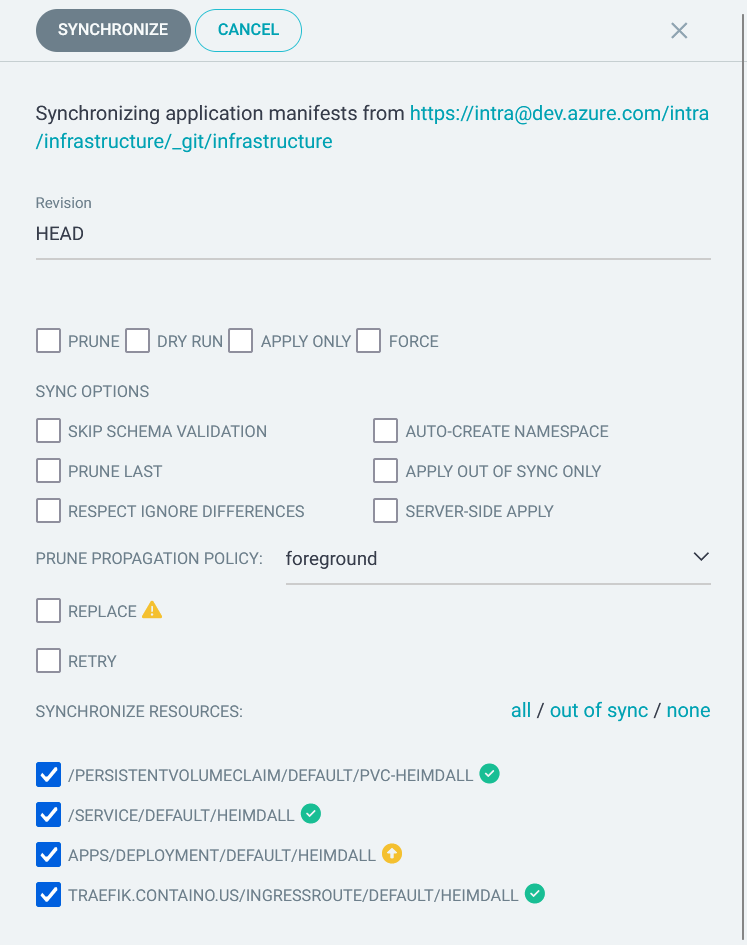
Clicking Synchronize triggers ArgoCD into action, and it applies the updated manifests to the cluster.
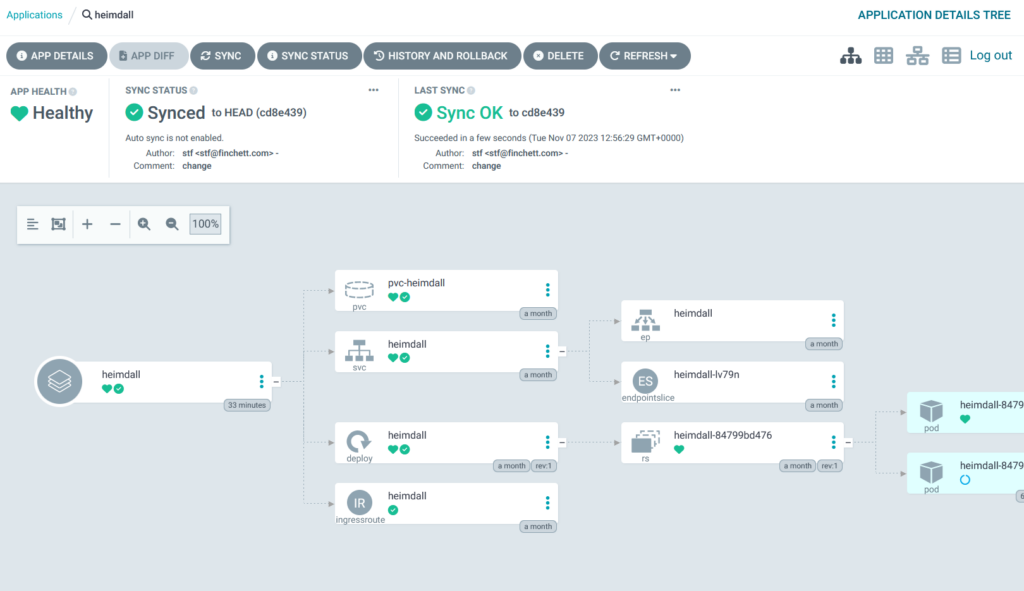
If you click on one of the application tiles, you get a really cool screen that shows you the different resources and their current status: –
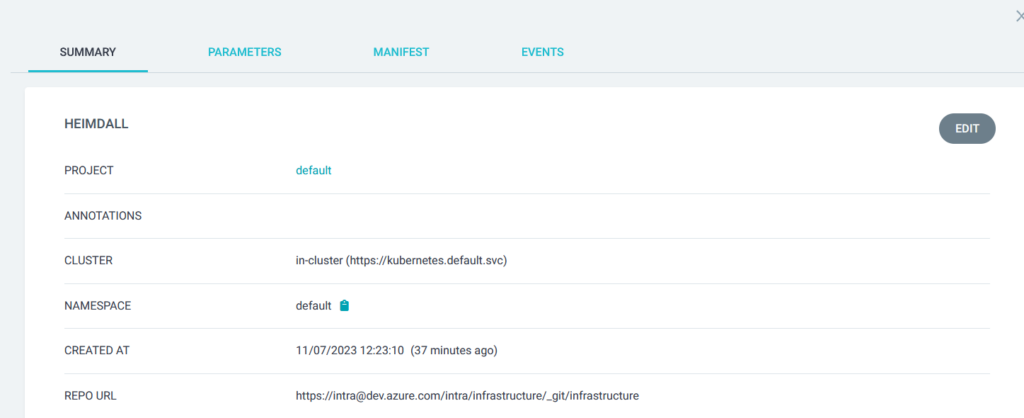
Once I am happy that the applications are being deployed correctly, I update the ArgoCD application settings so that they are synchronized automatically whenever anything changes in Git. To do this I click the App Details button to get this screen: –
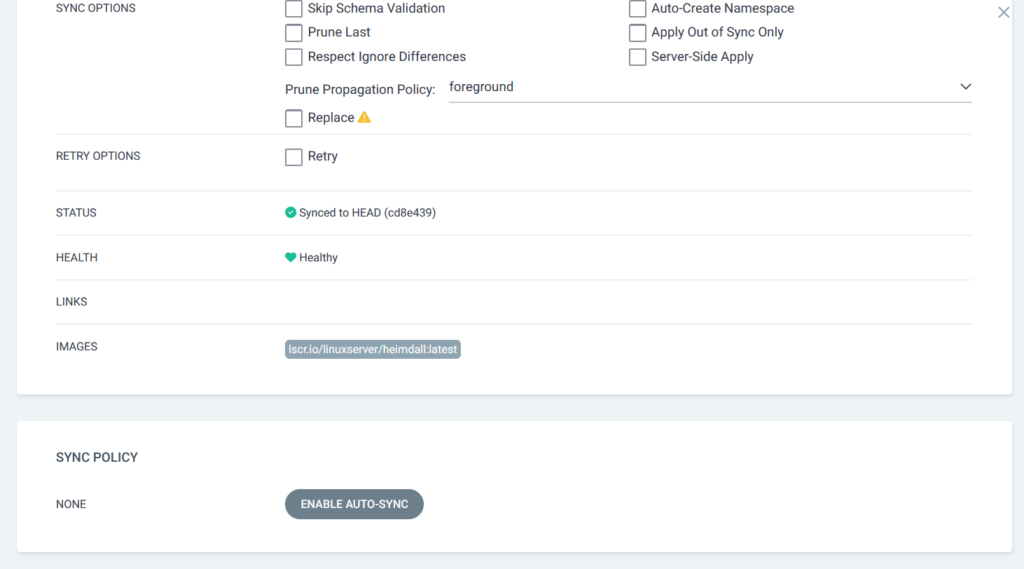
Then I click the Edit button to get this, where I scroll down to the Sync Policy section: –
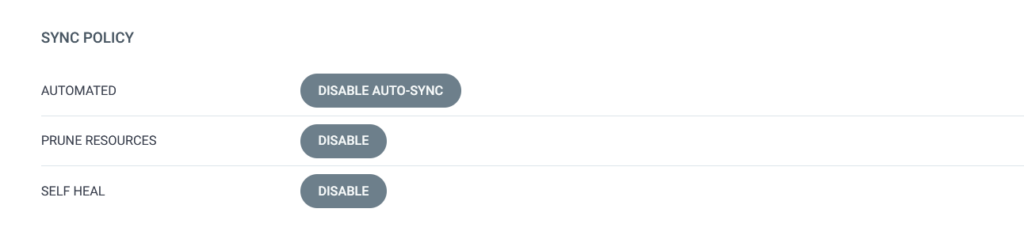
After confirming a popup warning message, I then set the following options: –
I then scroll back up to the top of the page and click the Save button – I frequently forget this step and then wonder why things aren’t updating automatically!
Here you can see that the changes were applied automatically: –
It can take a while before ArgoCD recognises there are differences between the manifests and the cluster – not hours but not seconds either – so be patient.
I visit my ArgoCD dashboard page to see the current status daily. The real power of this tool is its ability to monitor and deploy frequently changing applications in a development environment. This is something I will blog about in future, as the main reason I deployed ArgoCD was for my development projects and not the infrastructure projects- that is just an added benefit.


