
For years, I have added bookmarks to my browsers to enable me to navigate to the different systems I use. Typically, I open a list of pages whenever I launch my browsers, but as the number of systems has increased, I have not been happy with this way of working. So, I looked at a few different ‘home page’ tools to improve my life.
The first home page application I set up was Heimdall. This is a lovely application that runs as a web application in a Kubernetes container – although it is just as happy running in Docker, and you can install it directly on a Linux machine. However, Heimdall has no way to create sections or columns. So I looked for something else and found Homarr.
Where can I find Homarr?
Homarr has its home page here: – https://homarr.dev/
However, as I wanted to host it on my Kubernetes cluster, I needed it in a container. I found the container here: –
ghcr.io/ajnart/homarr:latestSetup Homarr in Kubernetes
Homarr needs a persistent volume claim for its configuration files. I set it up using Longhorn – my default storage provider in Kubernetes. This meant I needed to set up two persistent volume claims – one for the configuration files and one for icons – like this: –
apiVersion: v1
kind: PersistentVolumeClaim
metadata:
  name: pvc-homarr-configs
spec:
  accessModes:
    - ReadWriteOnce
  storageClassName: longhorn
  resources:
    requests:
storage: 1GiapiVersion: v1
kind: PersistentVolumeClaim
metadata:
name: pvc-homarr-icons
spec:
accessModes:
- ReadWriteOnce
storageClassName: longhorn
resources:
requests:
storage: 1GiAs Homarr only needs a small amount of space, I defined it as 1Gi for each claim – this is far more than it will need.
Then, I defined the deployment for Homarr like this:-
apiVersion: apps/v1
kind: Deployment
metadata:
  name: homarr
spec:
  replicas: 1
  selector:
    matchLabels:
      app: homarr
  template:
    metadata:
      labels:
       app: homarr
    spec:
      containers:
        - env:
            - name: PORT
              value: "7575"
          image: ghcr.io/ajnart/homarr:latest
          imagePullPolicy: Always
          name: homarr
          ports:
            - name: homarr
              containerPort: 7575
              protocol: TCP
          volumeMounts:
            - mountPath: /app/data/configs
              name: vol-homarr-configs
            - mountPath: /app/data/icons
              name: vol-homarr-icons
      volumes:
        - name: vol-homarr-configs
          persistentVolumeClaim:
            claimName: pvc-homarr-configs
        - name: vol-homarr-icons
          persistentVolumeClaim:
            claimName: pvc-homarr-icons
The two persistent volume claims are mounted as /app/data/config and /app/data/icons.
These manifests were created in a single yaml file called homarr.yaml.
To create the claims and the deployment within Kubernetes, I ran the following command: –
kubectl create -f homarr.yamlHaving created the deployment with a pod containing the application, I created a service and a Traefik ingress route with the following yaml.
The service was in a file called service.yaml: –
apiVersion: v1
kind: Service
metadata:
  name: homarr-service
spec:
  selector:
    app: homarr
  ports:
  - name: homarr
    port: 7575
The ingress manifest went into a file called ingressroute.yaml: –
apiVersion: traefik.containo.us/v1alpha1
kind: IngressRoute
metadata:
  name: homarr
spec:
  entryPoints:
    - websecure
  routes:
    - match: Host(`home.intrasoftware.uk`)
      kind: Rule
      services:
        - name: homarr-service
          port: 7575
  tls:
    secretName: intrasoftware-uk-tls
I then created the service and route in Kubernetes with the following commands: –
kubectl create -f service.yaml
kubectl create -f ingressroute.yaml
As you can see in the ingress route, this is set up as HTTPS://home.intrasoftware.uk, and means I can simply type that into my browser and have every system I use just a single click away.
Configuring Homarr
As I said earlier, one of the reasons I like Homarr is that you can define sections and columns. I have my dashboard set up like this: –
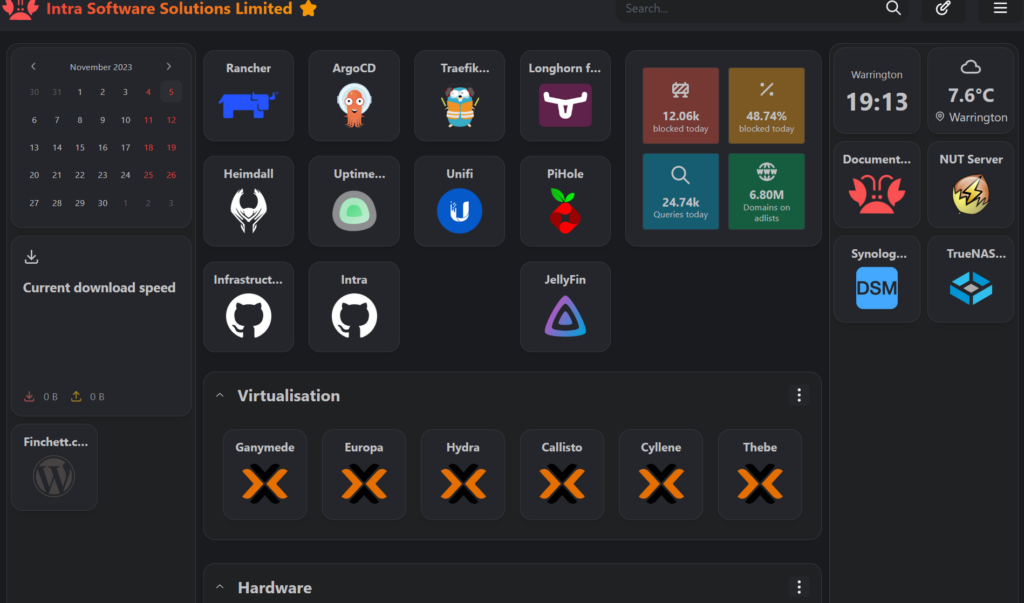
You add new items to the dashboard by clicking this icon in the header section: –

Once you click this icon, you can edit the existing items on the page or add new items. If you click ‘add new’, you get this popup: –
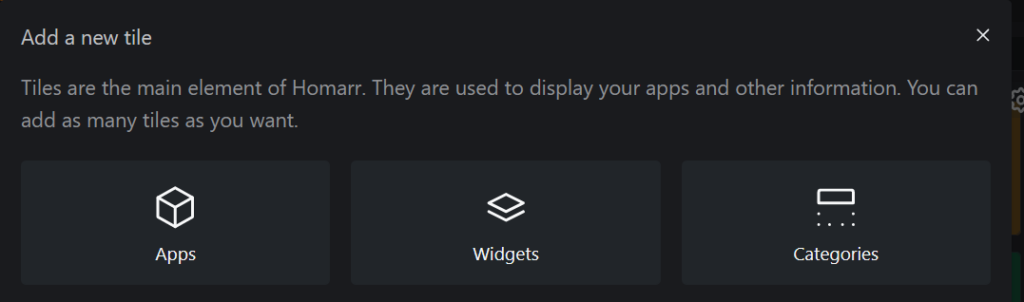
Apps allow you to add new links on the dashboard; Widgets are special items that integrate with systems, pull information from them and display it on the dashboard – the PiHole widget is one example. Categories allow you to add new sections to the dashboard. You can drag everything around the page.


