
Many different TFT screens are available for Raspberry Pi’s and other microcontrollers such as the ESP32. Most smaller screens cost under £10 and are available from many suppliers. I typically buy my devices from Amazon as I like the fact that I get free next-day delivery, and more often than not, when I start a project, it is a spur-of-the-moment idea I have, and I don’t have every component I need.
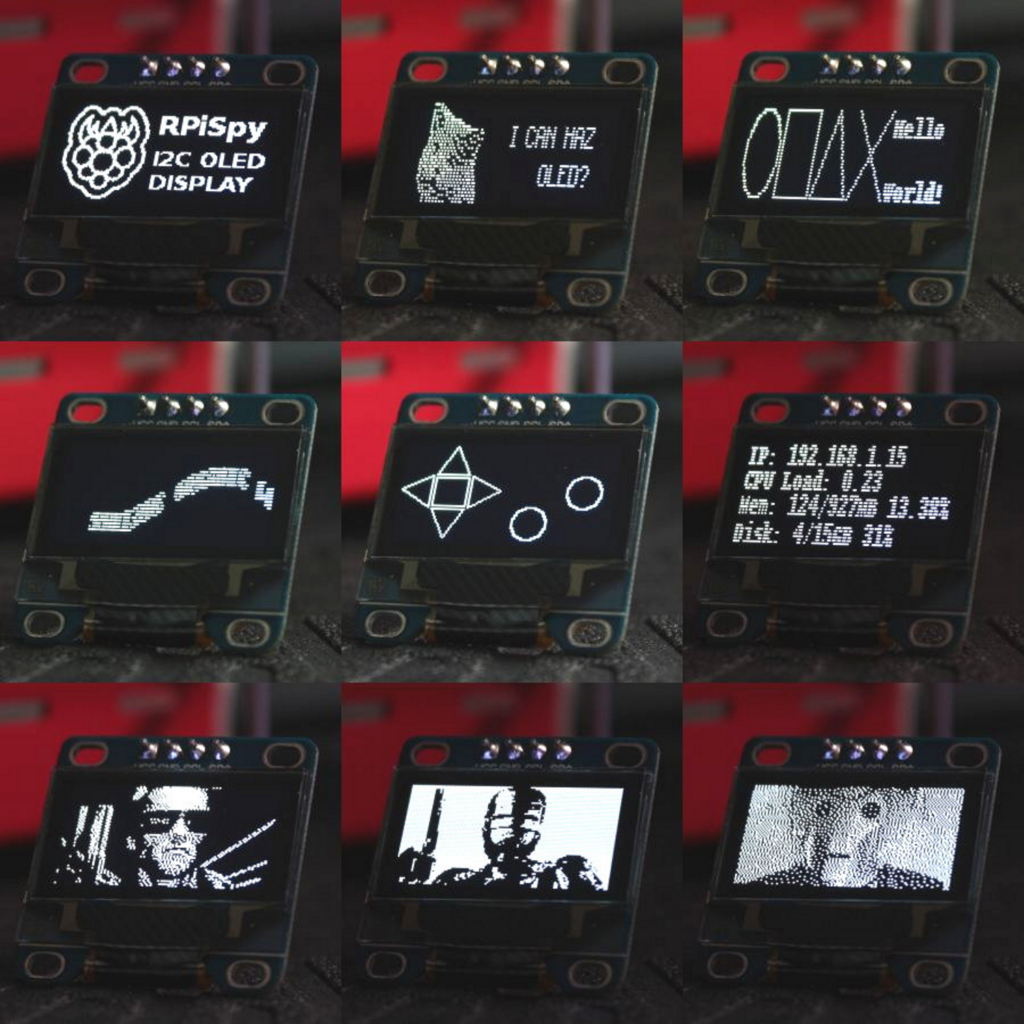
The smaller screens are usually one-colour screens in white, blue or yellow. There are a few with two colours – blue at the top and yellow at the bottom. I have a couple of these in my recent projects.
They look like this: –
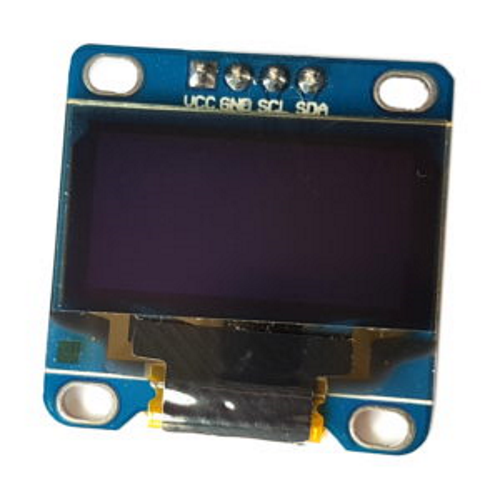
These screens can display text or graphics depending on what you need.
The screens I use have an I2C interface that uses 4 wires. Ground, power (typically 3.3V), SDA, and SCL.
Before you can use I2C on the Pi, the I2C interface must be enabled. You do this in the raspi-config program by running the following command: –
sudo raspi-configThe wiring for this display is as follows: –
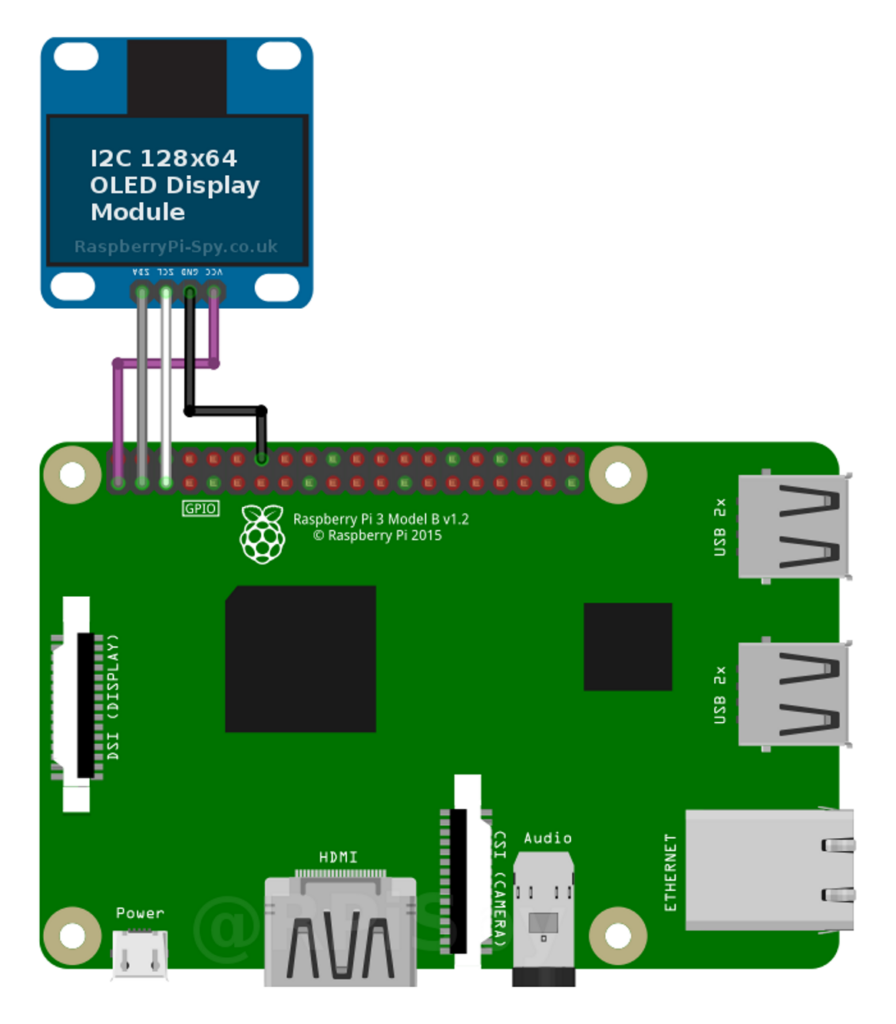
I connect them to the Raspberry Pi’s GPIO header using the following pins:
| OLED Pin | Pi GPIO Pin | Notes |
| VCC | 1 * | 3.3V |
| GND | 14 ** | Ground |
| SCL | 5 | I2C SCL |
| SDA | 3 | I2C SCA |
* You can connect the Vcc pin to either Pin 1 or 17, as they both provide 3.3V.
** You can connect the GND pin to 6, 9, 14, 20, 25, 30, 34 or 39, as they all provide Ground.
As many I2C devices can be installed onto the Pi, you need to determine the address for the screen on the I2C interface. To do this, you need a utility called ‘i2cdetect’. This can be installed using the following commands: –
sudo apt install -y python3-dev
sudo apt install -y python-smbus i2c-tools
After installing these packages, you issue the following command to display the devices connected to the Pi on the I2C bus: –
i2cdetect -y 1This displays a screen like this: –
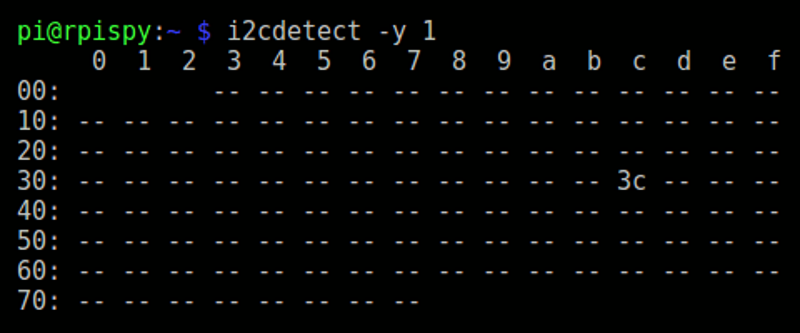
Here, the screen is at address ‘3c’.
The code below gives the ability to display text on the screen: –
using System.Device.I2c;
using Iot.Device.Ssd13xx;
using Iot.Device.Ssd13xx.Commands;
using SixLabors.ImageSharp;
using SixLabors.ImageSharp.PixelFormats;
using SixLabors.ImageSharp.Processing;
using SixLabors.Fonts;
using SixLabors.ImageSharp.Drawing.Processing;
using Ssd1306Cmnds = Iot.Device.Ssd13xx.Commands.Ssd1306Commands;

namespace IntraSoftware.ServerMonitor.Firmware.Screen
{
    public class ScreenHandler : IDisposable
    {
        private Ssd1306 screen;

        public ScreenHandler()
        {
            this.screen = new Ssd1306(GetI2CDevice());
            this.InitializeSsd1306(this.screen);
            this.ClearScreenSsd1306(this.screen);
        }

        public void Dispose()
        {
            if (this.screen != null)
            {
                this.screen.Dispose();
                this.screen = null;
            }
        }

        public void ClearScreen()
        {
            this.ClearScreenSsd1306(this.screen);
        }

        public void DisplayText(string message, int line, int column)
        {
            Ssd1306Cmnds.PageAddress page = Ssd1306Cmnds.PageAddress.Page0;
            switch (line)
            {
                case 1:
                    page = Ssd1306Cmnds.PageAddress.Page1;
                    break;

                case 2:
                    page = Ssd1306Cmnds.PageAddress.Page2;
                    break;

                case 3:
                    page = Ssd1306Cmnds.PageAddress.Page3;
                    break;

                case 4:
                    page = Ssd1306Cmnds.PageAddress.Page4;
                    break;

                case 5:
                    page = Ssd1306Cmnds.PageAddress.Page5;
                    break;

                case 6:
                    page = Ssd1306Cmnds.PageAddress.Page6;
                    break;

                case 7:
                    page = Ssd1306Cmnds.PageAddress.Page7;
                    break;

                default:
                    page = Ssd1306Cmnds.PageAddress.Page0;
                    break;
            }

            this.SendMessageSsd1306(this.screen, message, Convert.ToByte(column), page);
        }

        private I2cDevice GetI2CDevice()
        {
            Console.WriteLine("Using I2C protocol to connect to screen");

            I2cConnectionSettings connectionSettings = new I2cConnectionSettings(1, 0x3C);
            return I2cDevice.Create(connectionSettings);
        }

        // Display size 128x32.
        private void InitializeSsd1306(Ssd1306 device)
        {
            Console.WriteLine("Initialising screen");
            device.SendCommand(new SetDisplayOff());
            device.SendCommand(new Ssd1306Cmnds.SetDisplayClockDivideRatioOscillatorFrequency(0x00, 0x08));
            device.SendCommand(new SetMultiplexRatio(0x1F));
            device.SendCommand(new Ssd1306Cmnds.SetDisplayOffset(0x00));
            device.SendCommand(new Ssd1306Cmnds.SetDisplayStartLine(0x00));
            device.SendCommand(new Ssd1306Cmnds.SetChargePump(true));
            device.SendCommand(
                new Ssd1306Cmnds.SetMemoryAddressingMode(Ssd1306Cmnds.SetMemoryAddressingMode.AddressingMode
                    .Horizontal));
            device.SendCommand(new Ssd1306Cmnds.SetSegmentReMap(true));
            device.SendCommand(new Ssd1306Cmnds.SetComOutputScanDirection(false));
            device.SendCommand(new Ssd1306Cmnds.SetComPinsHardwareConfiguration(false, false));
            device.SendCommand(new SetContrastControlForBank0(0x8F));
            device.SendCommand(new Ssd1306Cmnds.SetPreChargePeriod(0x01, 0x0F));
            device.SendCommand(
                new Ssd1306Cmnds.SetVcomhDeselectLevel(Ssd1306Cmnds.SetVcomhDeselectLevel.DeselectLevel.Vcc1_00));
            device.SendCommand(new Ssd1306Cmnds.EntireDisplayOn(false));
            device.SendCommand(new Ssd1306Cmnds.SetNormalDisplay());
            device.SendCommand(new SetDisplayOn());
            device.SendCommand(new Ssd1306Cmnds.SetColumnAddress());
            device.SendCommand(new Ssd1306Cmnds.SetPageAddress(Ssd1306Cmnds.PageAddress.Page1,
                Ssd1306Cmnds.PageAddress.Page3));
            Console.WriteLine("Initialised");
        }

        private void ClearScreenSsd1306(Ssd1306 device)
        {
            device.SendCommand(new Ssd1306Cmnds.SetColumnAddress());
            device.SendCommand(new Ssd1306Cmnds.SetPageAddress(Ssd1306Cmnds.PageAddress.Page0,
                Ssd1306Cmnds.PageAddress.Page3));

            for (int cnt = 0; cnt < 32; cnt++)
            {
                byte[] data = new byte[16];
                device.SendData(data);
            }
        }

        private void SendMessageSsd1306(Ssd1306 device, string message, byte col, Ssd1306Cmnds.PageAddress line)
        {
            device.SendCommand(new Ssd1306Cmnds.SetColumnAddress(col));
            device.SendCommand(new Ssd1306Cmnds.SetPageAddress(line,
                Ssd1306Cmnds.PageAddress.Page7));

            foreach (char character in message)
            {
                device.SendData(BasicFont.GetCharacterBytes(character));
            }
        }


    }
}
This code uses a couple of freely available libraries and some standard Dot Net ones.
using System.Device.I2c;This is a standard Dot Net core library for communicating with I2C devices.
using Iot.Device.Ssd13xx;
using Iot.Device.Ssd13xx.Commands;
These librarys provide access to the Ssd13xx display devices. They come from a github project at: –
This is Microsoft’s IOT library. Another useful URL is: – https://learn.microsoft.com/en-gb/dotnet/iot
The other libraries with the prefix SixLabors are an open source 2D cross platform image / graphics library. It can be found here: – https://github.com/SixLabors/ImageSharp
To display text on the screen, you simple access this ScreenHandler class like this: –
using ScreenHandler screenHandler = new ScreenHandler();
screenHandler.DisplayText($"Hello IOT", 0, 0);
The ‘0,0’ are the X/Y coordinates.
Simple when you know how.
Other types of screens can be connected to a Raspberry Pi using the SPI interface. These devices usually have more pins. An example screen type is an ST7789 and it is wired like this: –
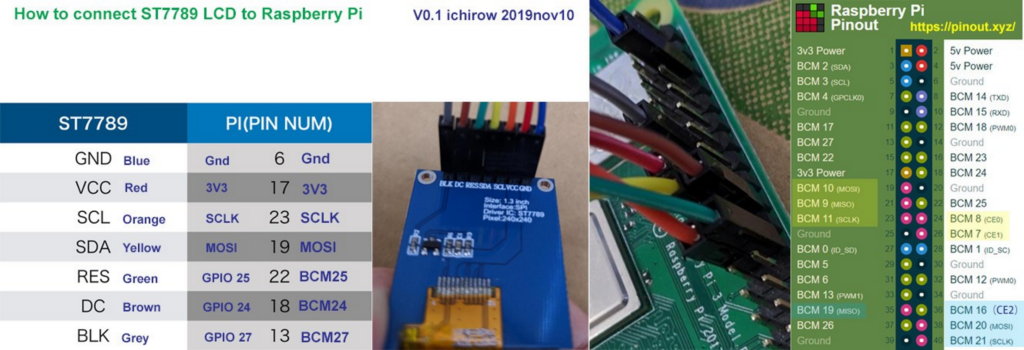
I’ll create another post with the details / code needed to update one of those.


